Package Contents
 |
|---|
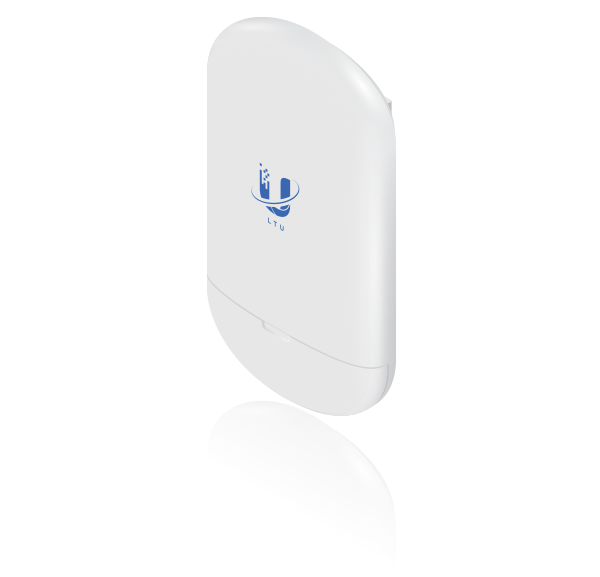
| LTU-Lite |
 |
|---|
| Wall Mount Bracket |
 |
|---|
| Screws (Qty. 2) |
 |
|---|
| Screw Anchors (Qty. 2) |
.png) |
|---|
| Zip Tie |
 |
|---|
| Gigabit PoE (24V, 0.5A) with Mounting Bracket |
 |
|---|
| Power Cord |
Installation Requirements
- LTU PtMP AP, such as model LTU-Rocket
- Phillips screwdriver for wall-mounting
- Outdoor, shielded Category 6 (or above) cabling and shielded RJ45 connectors are required for all wired Ethernet connections.
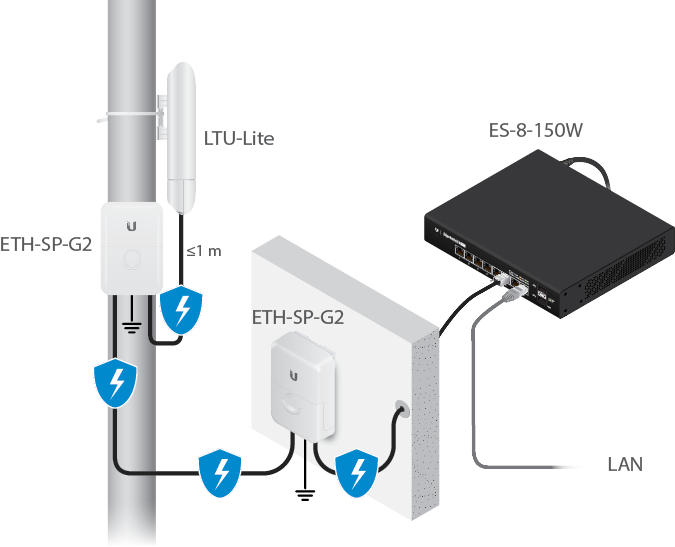
- Surge protection should be used for all outdoor installations. We recommend that you use two Ethernet Surge Protectors, model ETH-SP-G2, one near the device and the other at the entry point to the building. The ETH-SP-G2 will absorb power surges and safely discharge them into the ground.

Note: For guidelines about grounding and lightning protection, follow your local electrical regulatory codes.
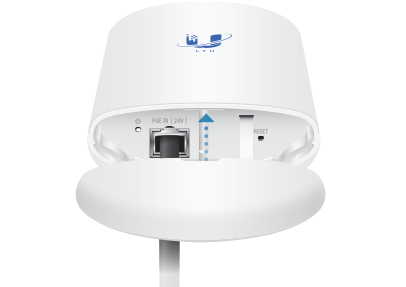
Hardware Overview
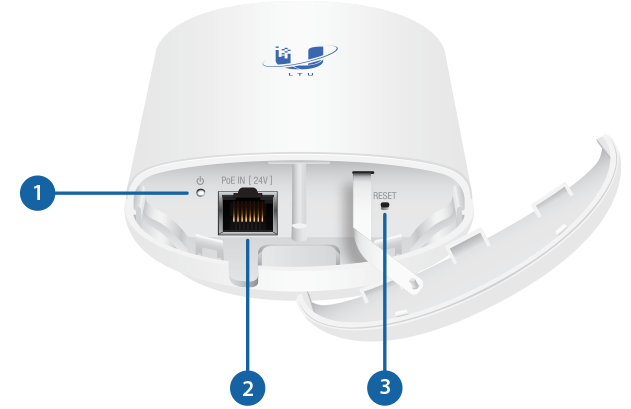
 System LED |
|
|---|---|
Blue |
Initial power-up. |
Flashing White |
Bootup in progress. |
White |
Ready for use. |
Alternating |
Firmware upgrade in progress. |
 Ethernet Port |
|
This 10/100/1000 Ethernet port is used to connect the power and should be connected to the LAN and DHCP server. |
|
 Reset Button |
|
To reset to factory defaults, press and hold the Reset button for more than 10 seconds while the device is powered on. |
|
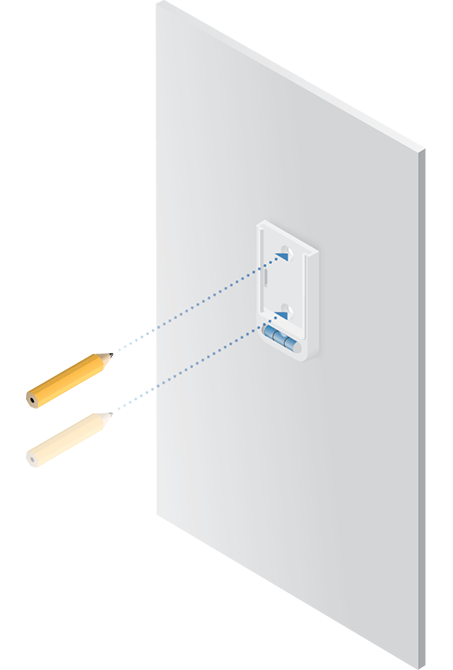
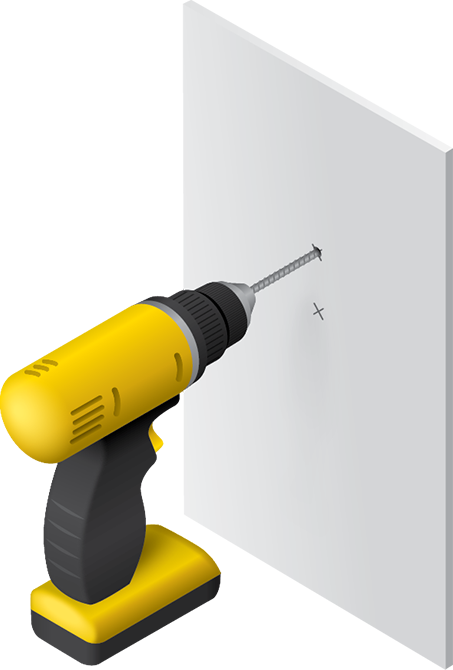
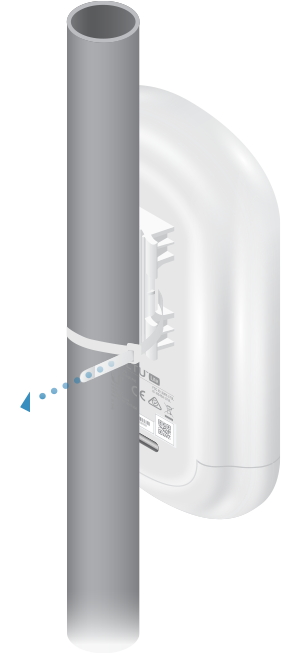
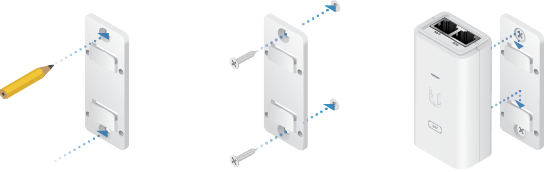
Hardware Installation

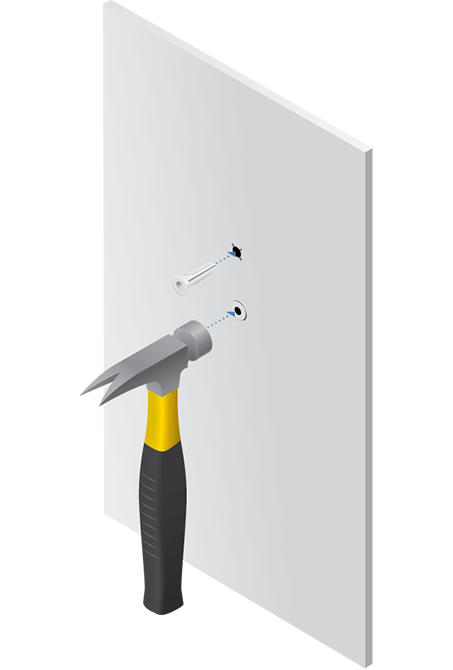
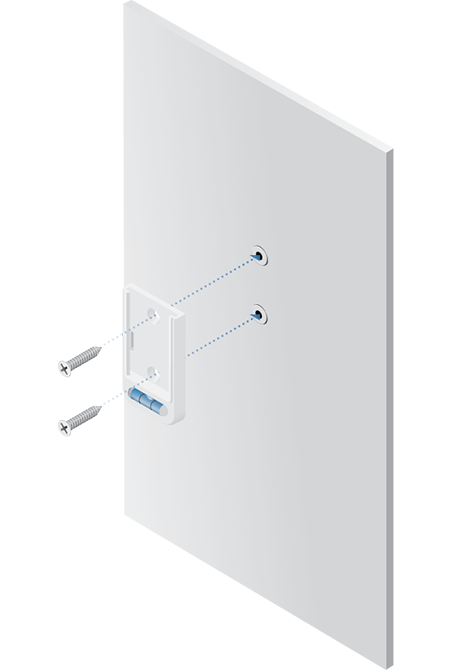
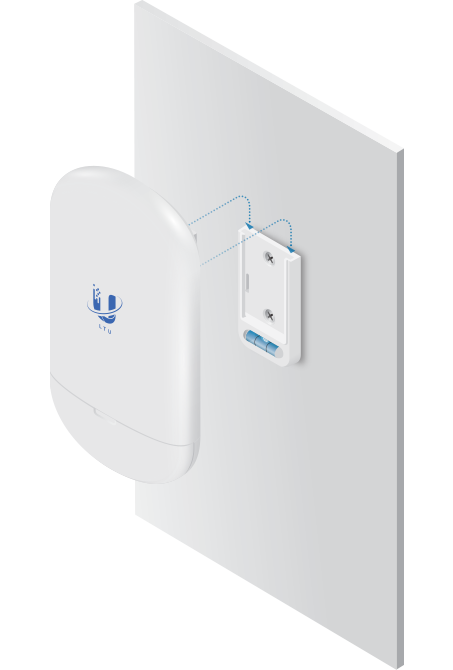
Wall Mount
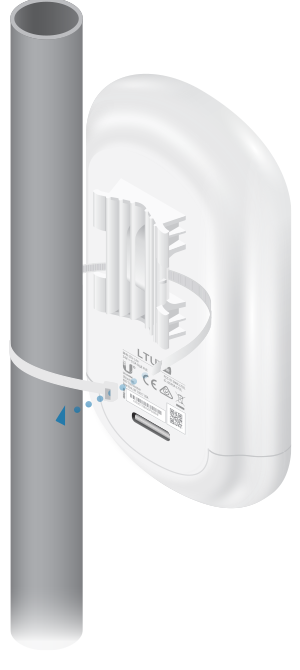
Pole Mount

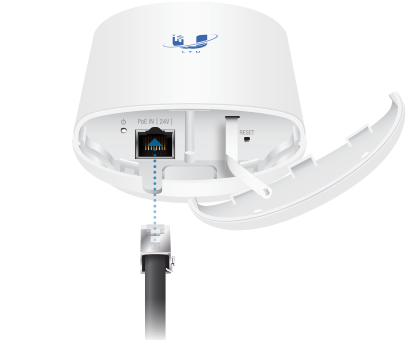
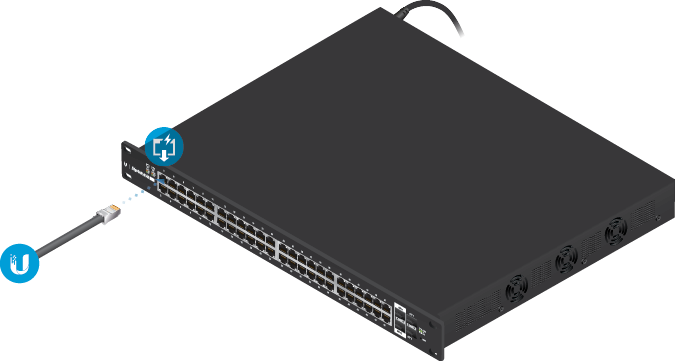
Connecting Power
|
|
WARNING: The switch port must comply with the power specifications listed in “Specifications”. |
|---|

OR
![]()
Optional
Accessing the Configuration Interface
- Make sure that your host system is connected via Ethernet to the device.
- Configure the Ethernet adapter on your host system with a static IP address on the 192.168.1.x subnet.
- Launch your web browser and type https://192.168.1.20 in the address field. Press enter (PC) or return (Mac).

- Select your Country and Language. You must agree to the Terms of Use to use the product. Click Continue.
The LTU Configuration Interface will appear, allowing you to customize your settings as needed.
UISP Management
You can manage your device using UISP, which lets you configure, monitor, upgrade, and back up your devices using a single application. Get started at uisp.ui.com
Find My AP
- Click the
 icon.
icon. - In the Wireless Settings section, change the channel bandwidth (default: 20 MHz) as needed.
Note: For example, if the AP’s channel bandwidth is set to 50 MHz and your device is set to 20 MHz, then your device will not see that AP and you should change the channel bandwidth on your device.
- Click Find AP.
- The device will scan for nearby APs. Click Select for the appropriate AP. To run the search again, click Scan.
- Follow the on-screen instructions.
Installer Compliance Responsibility
Devices must be professionally installed and it is the professional installer’s responsibility to make sure the device is operated within local country regulatory requirements.
The Auto Output Power field is provided to the professional installer to assist in meeting regulatory requirements.
Specifications
|
LTU-Lite |
|
|
Dimensions |
153 x 84 x 39.5 mm |
|---|---|
|
Weight |
250 g (8.82 oz) |
|
Networking Interface |
(1) 10/100/1000 Ethernet Port |
|
Enclosure |
Outdoor UV Stabilized Plastic |
|
Max. Power Consumption |
8.5W |
|
Power Supply |
24V, 0.5A Gigabit PoE Adapter (Included) |
|
Power Method |
Passive PoE 2-Pair (Pairs 4, 5+; 7, 8-) |
|
Supported Voltage Range |
22 - 26V |
|
Gain |
13 dBi |
|
Mounting |
Pole Mount Wall Mount (Kit Included) |
|
Wind Survivability |
200 km/h (125 mph) |
|
Wind Loading |
20 N @ 200 km/h |
|
ESD/EMP Protection |
± 24kV Contact / Air |
|
Operating Temperature |
-40 to 60° C (-40 to 140° F) |
|
Operating Humidity |
5 to 95% Noncondensing |
|
Certifications |
CE, FCC, IC |
|
Operating Frequency (MHz) |
||
|
Worldwide |
4800 - 6200* |
|
|---|---|---|
|
US/CA |
U-NII-1 | 5150 - 5250 |
|
U-NII-2A | 5250 - 5350 |
|
|
U-NII-2C | 5470 - 5725 |
|
|
U-NII-3 | 5725 - 5850 |
|
* Depends on regulatory region.
|
Bluetooth LE Management Radio (MHz) |
|
|
Worldwide |
2400 - 2483.5 |
|---|---|